Thursday, February 24, 2011

Card Cupid Challenge: use buttons and/or ribbons

I think I've talked about the great work that the organization Card Cupids does....they are a relatively new org, but offer a great way for crafters to do something to bring a smile to the faces of some brave (yet sick) kids.

I recently sent off my first packet of cards to their cupid cuties...and hope to send some more soon.

In the meantime, they surprised me by having a challenge with giveaways. It amazes me how many of these crafting blogs/orgs do great service and yet spoil us volunteers with goodies.

Anyway, they offered up a challenge to make a card with ribbons and/or buttons.

I have a lot of both, so I wanted to make sure that I forced myself to use some of my inventory and make a cute card that I can eventually send off to Card Cupids for a special munchkin!


It's not my favorite card, but I was able to use some scraps, a leftover die cut (made with the Tim Holtz line at Archivers) and lots and lots of buttons!

Cricut Circle Blog Weekly Challenge 21: Animal Magnetism

For this challenge your project must include something related to an animal. You can create your project for or about an animal, include an animal cut, use animal print, etc. Project must also contain a tleast 2 Cricut image cuts to qualify.

If you've been a part of my life since I started scrapbooking, then you know two things are true:
  1. I overspend on stuff because I do not currently have my existing inventory in any sort of order.
  2. Despite the years of scrapbooking, I have YET to make my own scrapbook.

What I love about these weekly challenges is that they are forcing me to create for fun (and possible prizes).  This means I get to play with some of my supply (and organize and I search through it), and I get to slowly build up pages and cards that are meant for no one in particular.  So I may just come out with the beginning of an album for ME!

Anyway, the current and only man in my life is my kitty, Charlie.  Charlie has been a part of my family (used to be mine and Sogol's family before she divorced me to get married) since November 2005.  I rescued him from my dad's coworker's house/barn.  The entire family was allergic to cats and their barn cat had had a litter.  When we visited them, we walked away with three beautiful kittens - two of which have remained in each other's lives since day one.

Charlie and Sol....the most playful and loving brothers ever.  I just love to watch these guys together.  This was a moment in time captured early in their lives, and it's fun to realize that you can still find these two sitting just like this!

I used some left over scraps from a bin of paper I have under my desk to make a contrasting background.

The cartridges I used to complete this page were Heritage (my newest addition) and Ashlyn's Alphabet.

heart from Ashlyn's Alphabet

Trying to make sure I date pages when I can...I'm terrible at this!
Also made a conscious decision to journal...I don't want to take for granted that I might not always remember who these two fellas are!
 

Monday, February 21, 2011

Cricut Magazine call out for submission to future Bday Idea book - Celebratory Cubes

Celebratory Cubes

Friends who scrapbook with me often tease me for my "simplicity."  They say that I often find designs that are simple at first glance but when you start to piece together what it will take to make one of my items, you often realize that it's something with lots of little details....so patience and a willingness to deal with tedious repetition is often needed to finish one of my projects.  This is one of those examples.


I'm really proud of this card...can't believe it translated from my head onto the page :)
The letters on the banner were really hard to cut out because they were so small.  Some of the thinner parts of the letters didn't come out clean, so I embellished the letters with glitter domes to add dimension and hide any "imperfections."
I followed the visual triangle rule and repeated the glitter domes in the corner embellishment.


  • Used Cricut Expression machine
Non-Cartridge Supplies
K&Company 12x12 Suzy Ultman Designer Paper - Lion Sleeps
5x7 card
Mark Richards Glitter Dome White Crystal stickers
Embroidery Floss in Dark Brown
Paper Source solid paper - Chocolate, Eco White


Cartridges (with cuts)
Accent Essentials
Accent27s, 1 inch (26 times in various colors)
Accent 27s, 3.25 inch
Accent 27s, 3 inch

Storybook
CrnrSwrl, Fancy/Corner (shift) - 1.74 inch

Plantin Schoolbook
letter for banner - 1/2 inch

Celebrations
girl - 1.5 inch
tribanner, blackout, shift - 1 inch

Cricut Magazine call out for submission to future Bday Idea book - A Plaidtastic Bday

I was inspired by a plaid table cloth I once saw used at a gentleman's 40th bday celebration.  I thought the soft hue and color combination was great....not the stereotypical blackwatch plaid.


I love that these Stampin' Up! stamps come with certain words separated (like Feliz) so I can use it in multiple ways.

  • Used Cricut Expression machine
Non-Cartridge SuppliesKraft paper
Bazzill Basic Paper - Maraschino, Sunbeam
Die Cuts with a View paper - Green #2
Coredinations, core color pack - Turquoise
Adirondack Lights Acrylic Paint Dabber in Sandal
Ranger Tim Holtz Distressed Inks - Vintage Photo, Peeled Paint, Fired Brick
Stampin' Up! Frases Basicas - Feliz, Cumpleanos (stamps)
Dimensional adhesive foam (for balloon)

Celebrations (with cuts)
Shadow
blin1 - 2 inch
blin2 - 2 inch
blin3 - 2 inch
blin4 - 2 inch
blin1-s - 2 inch
blin2-s - 2 inch
blin3-s - 2 inch
blin4-s - 2 inch

Ashlyn's Alphabet
brace - 1/2 inch

For plaid weave
Cut 1/2 and 1/4 inch strips and weaved them together.  I then used the acrylic paint to 'distress" the strips and edge of the card.

Wednesday, February 16, 2011

Cutest Baby Card - design from Cricut Magazine

Here I go again...I'm about to write another glorious post about my Cricut Expression. If you're tired of hearing it - you're gonna have to get over it because I am more and more amazed by all the fun things I can do with it.

My co-worker is a new aunt (yay!), and she had asked if I would make her nephew a card.  Of course I said yes....I think I was just as excited to await his arrival.

Well, I recently joined the Cricut Circle blog and subscribed to the magazine.  O-M-G....the Feb/March 2011 issue has such cute ideas, and I saw a card in there that I knew I had to produce in my own version.


How cute is this card?!  

Side note, my inspiration was on page 22 of the magazine.  The person who designed it also did some stitching on her version, but I'm not very comfortable with using a sewing machine on paper yet.  However, tomorrow, I am getting a cool stitch guide from Stampin Up! that will let me create a cool stitching effect.  Can't wait to pick that up!  I curse it out everytime I've used it from friends because it takes so long, but the look is incredible.

So what was involved in this cute creation?  Two cartridges:  Plantain Schoolbook and New Arrival.

Plaintain Schoolbook
The base stars are 5.5 inches (roly poly item).  
The top printed star is 5 inches. 
I think made a small star (I think it was 1.25 inches) 
and a small tag (1 inch).

The word boy came from the New Arrival cartridge (the whole cutout says "It's a Boy!"  I think this was a 2 inch size.

To attach the two green stars, I just had to score the top "point" of the back star and adhere the top star to that portion.  This allows for the card to open up and lay flat for writing.  Who knew that's all you needed to create such a fun effect.  I can't wait to try the same technique with another shape!

Also, I'm eager to make some cards this weekend.  Cricut magazine put out a call out for submissions for future issues.  So I've got to get creative.  I think I'm going to try and make some Spanish cards to stand out from the pack!

One of my goals this year is to get published in a national scrapbooking publication - so why not start here!

Sunday, February 13, 2011

Cricut Circle Blog Weekly Challenge 20: Love Notes

So I learned that the weekly challenge winners are selected randomly.  Though that was a stab to my competitive heart...I was kind of glad to hear that the process is pretty fair.  I know that I'm not a newbie not like some of the folks on the blog, but I'm also nowhere near the levels of some of the work I have seen.  So this is really just fun and inspiring.

This week's challenge was to create a love note. 

Your project must include a heart and embossing (we want to see you incorporate those Cuttlebug embossing folders). Project must also contain atleast 2 Cricut cuts to qualify.

I decided to make a Valentine's Day card with some leftover paper. I created a card that expresses the 1000 kisses I wish to shower my love with.

I must admit that these challenges are helping me look through stuff and challenging me to find ways to use some of my scraps.  I tried to combine a few colors...but stuck to the traditional pink and red for V-day.


Here's a close-up of the cute embossing folder I used - called Spots & Dots.
To bring in a bit of the blue, I lightly brushed some Ranger Distress Ink (weathered wood) on the embossed circles.  It gave them a little tint of blue.  Not sure if you can see them in the picture that well.


I wanted to balance all the colors throughout the card, so I layered ribbons at the bottom section next to the cute Marquee.

Here's a close up of the Marquee with half of the wording from Winter Woodland cartrdige.  The full cut out says Frosty Kisses, but I eliminated the Frosty as there is nothing frosty about that many kisses!


Nothing fancy here...just something I put together quickly while watching the Grammy's.  It's fun to multi-task with crafts.  LOL

Here are the cartridges I used:
  • Marquee - Storybook (Once Upon -Accent Blackout, 1.75inch)
  • Kisses - Winter Woodland (Frosty Kisses, 1.75inch)
  • Number 1 - Storybook (1.75inch)
  • Hearts - Ashlyn's Alphabet (Heart, Base Shadow), Plantin Schoolbook (Heart, Shadow), Accent Essentials (Accent 36 & Accent 36s), all 2inch
  • Embossing Folder - Spots & Dots
  • Distress Ink - Weathered Wood & Tattered Rose

Saturday, February 12, 2011

The continual reorganization

If you have had the pleasure to come and scrap at my house, you know that I am in dire need of some professional organizational help!

I actually find it comical that my home space is not as anally organized as my work space.  Maybe it's because I spend more hours at work or because I'm constantly paranoid that I'll be out and a colleague will need some file.  Guess I'm being a considerate co-worker, huh?

So why can't I be as considerate with myself and my scrapbooking items?!  I'm nice enough to have a separate room for them, but boy oh boy do I have a mess of stuff!  I actually recently entered a Container Store contest hoping to get some funds to organize the room.  Here is the photo I submitted:


You can see the pockets and attempts to organization. Some of my items are organized but don't let the bins and storage containers fool you.  Some of those are just stuffed randomly!  Ugh!

And as many of you know, I've recently fallen in love with my Cricut Expression machine...the BEST purchase made to date.  Well, as I get lucky enough to purchase more and more cartridges...I'm starting to realize that their product packaging takes a ton of unnecessary space.  The hunt for the best storage began.  Cricut hasn't really made a great one - though they do have an option.

Snapcessories has a cute option that holds 8 cartridges.  It's stackable with other variations of the inserts (to store different things).  I only have 9 cartridges and was considering this option because I liked one of their other units that stores Stickles.


Today, I was going to purchase the Caddy, but was going through my email first.  I was super excited to find an email from Tiffany Spaulding about an upcoming storage unit that meets more of my needs.  It's the perfect size to put on my shelf and to put in my rolling carrying case.  So I purchased it today and can't wait for it to arrive.

This unit holds 16 cartridges and their accompanying booklets and key pads.  As I know have 10 (or 11) cartridges, this is now the perfect find for me!

Wednesday, February 9, 2011

My mission: a mission statement

So, I'm no stranger to strategic planning.  Good lord....my MBA concentration was in Strategic Management, but why oh why am I having such a difficult time with zeroing in on my own company's mission statement?

I've sat on multiple boards, have had to go through this process at my current and previous employers...and yet...here I am with nothing solid.

So I decided to use a trusty source - Google!  Why not see what's out there, right?  Well, try doing a search for mission statements and try to figure out how to narrow down all the results.  I chose to go with images and here are some of the more "inspiring" examples.

This is a good overall target....but it's not really what I want to put out there for potential clients or investors. 

Again - I think this is the ultimate goals of most businesses, so I'm not hating the idea...it's just that my purpose for creating a company is so much more than the financial possibility.  That's just the potential perk.
A mission statement should answer four things:
  1. capture your purpose
  2. must be customer oriented
  3. express the company's philosophy
  4. encompass the values
So here I am.....here is where I am stuck.  I can't seem to find the right words!  So I decided to blog about it and see if I can bounce off my thoughts with some of you.  So feedback would be greatly appreciated!

Some of the core elements of why I decided to launch a business include:
  1. Wanting to help clients represent their "whole" self - culturally/ethnically, visually, verbally (through journaling, for example)
  2. To fill a void in the scrapbook/craft industry for tools/embellishments that represent various ethnic/cultural entities.  In my case, I'm most interested in the Latino culture first, but I would love to create a line that targets the multicultural richness that is the world.
  3. To teach/inspire others to craft - because at the end of the day, only you can fully capture the memory. 
Try saying all that in less than 50 words (I don't believe in long mission statements)!!!  


Laura Bray - I heart her!

As if I haven't already raved about my CHA (Craft & Hobby Association) webcast experience...but I gotta throw out some love to the super adorable Laura Bray.


You see....while on the webcast, we were introduced to many, many designers and manufacturers. Those that came to interact with us viewees were subjected to our silliness and our questions.  The top two questions that always came up were - "what's your website?" and "do you have blog?"

Laura was kind enough to share all the info with us, and I remember that she mentioned that she also had a newsletter that we could sign up for that would give us some tips on starting our own business.  She jokingly stated that she wanted to put her MBA to good use :)  Having learned a little bit more about her now, I chuckled.  She clearly had already put her MBA to great use and was now continuing to do so while pursuing her passion.

Enter me.....I have an MBA....and I want to figure out how to fully invest my time and resources into the crafty world.  So OF COURSE I signed up!

When you sign up, it asks you to tell Laura a little about yourself and to give her an idea of what you might want her to address in the newsletter.  I thought that was a great way of sampling her readership - a mini focus group.

Little did I expect that she would not only respond in great detail (with some great business suggestions), but she also checked out my homemade website.  

I was soooo tickled and touched that she would take some time out for me.

Very, very cool!

Tuesday, February 8, 2011

Cricut Circle Magazine Challenge: My Sweet Valentine

Today's crafty project was my submission for the Cricut Circle Magazine Challenge.  

The My Sweet Valentine challenge asked us to use at least four Cricut cuts and include something edible in the design. I thought this would be a fun challenge, so I decided to give it a whirl.

I have pretty much only stuck to traditional scrapbooking and card making, but I wanted to try something new.  Enter into my crafty world - the altered pail.

It's filled with yummy chocolate, of course!

I added a few fun ribbons (sorry for the blurry picture).  It's been fun to look through my stuff for these projects/contests....I'm being force to remind myself of what I have.  Best ribbon found...the adorable XOXOXO.


On the other side of the pail, I added a cute tag which I layered with a canvas (inked) heart that I stapled.  I also had some $1 Jo-Ann fabrics metal embellishments (from a thank you set) that I layered on top of the canvas heart.  I really like the different textures.


Lastly, I added a little fun to the lid cuz who doesn't "enjoy" chocolate!

So what are the cricut cartridges I used to make this cute valentine treat holder?
  • Heart border (bottom of pail) - Storybook (3/4 inch, cut 9 times to make it around the base of the pail)
  • word Love - Winter Woodland (1 3/4 inch)
  • capital U - Ashlyn's Alphabet (2.5 inch)
  • scalloped circle on lid - Graphically Speaking (3 inch)
  • Hearts on lid - Accent Essentials (2.5 and 2 inch)
  • Enjoy on lid - Graphically Speaking (1.5 inch)

Monday, February 7, 2011

Cricut Circle Blog's Weekly Challenge #19 - the Whatevah! Challenge


Have I mentioned how much I love my Cricut Expression?  Well, as if I didn't already love it, I was recently clued in to their membership based blog that has weekly and monthly challenges!!!!!

So I decided to take a gander and enter this week's weekly challenge...it's theme is Whatevah!

Basically, I had to cut a shape from one of the cricut cartridges three times and use it in whatevah way I wanted, so I decided to take advantage of some extra photos I had from an album I just finished.  I used three images from three different cartridges and made sure to use triple versions of each.

Welcome the cuteness of Aasha!

What I used to make this adorable page:
  • Karen Foster paper - Sugar Sweet
  • Bo Bunny paper - Archivers limited edition pack (included pages from Flutter Butter, Delilah & Alissa)\
  • Flower cutouts - Stamping cartridge
  • Butterfly cutouts - Storybook cartridge
  • Leaf cutouts - Ashlyn's Alphabet cartridge
  • Tim Holtz distress inks - Dusty Concord, Tattered Rose, Peeled Paint, Pumice Stone
  • Tsukineko Shimmer - Copper Sheer
  • Alphabet stickers (no longer had the brand for either the green or purple letters)
I also took a stab at doodling on this layout a bit more than my last attempt.  I added some contrast to the butterflies, a flight path, and highlighting on the polka dots.  I also made sure to journal on the page which is a habit I'm trying to ingrain in my scrapbooking (you should always try to add some journalling to your pages).

The last official snow day

I'm gonna have to admit something....these snow days have been fun (sort of)!

I'm cursing the fact that it has snowed so much (in fact, it's snowing right now), but it really has forced me to just take a breather and have some fun.  Not being allowed to go to work because of the parking madness also ended up being a blessing in disguise.  Sure it's tough doing things remotely, but I've been able to keep up with most work responsibilities while away.  I'm gonna miss this.

So what was this weekend's source of inspiration.  Well, it's actually a new club that I'm happy to have joined thanks to my friend, Elisa.  Elisa has a friend who sells Stampin Up! products (which are a ton of fun).  Once a month, a group of women get together with this demonstrator to purchase some items and to swap homemade cards!

Each  month has a theme and every one has to bring enough cards to pass around.  January's theme was birthday, and this was the crazy tedious card I created. I never seem to pick an easy route when it comes to scrapbooking, but I just fell in love with a similar card and had to try it out myself.


This month's theme is "Use your stuff", which means that we are supposed to find something that we have and haven't used yet.  If you've been to my house, you know that my scrapbook room has tons of items that have NEVER been used.  I know, I know...such a waste of money, but I'm always confident that I'll have a reason to use it and most of my crafty items are purchased on sale.

Ha!  I love how I try to reason with myself.

Anyway, I had been planning to use up some chipboard, but I realized that I much prefer to use that on scrapbook albums versus cards, so I went back into the abyss of the scrapbook room.  What did I decide to use up - paper!

I had picked up two paper packs from my local Archivers by Deja Views.  I had two 8x8 Butcher Block packs and I decided to use my Eggplant & Moss Block for this task.


I tried not to use anything else, but I did use some Tim Holtz distress ink (my favorites) - Pumice Stone and Dusty Concord.

Since all the cards did not have to be of the same design, I was able to just play with what was available in the Butcher Block.  There were die cuts - alphabets, borders, frames, tags - and paper.  So I pretty much had everything I might need.

I like some of my cards better than others, but isn't that always the case.  Here are just a few pics of some of the everyday cards produced.


Friday, February 4, 2011

A little dose of much needed inspiration

In case you haven't noticed, I've been bitten by quite a large dose of much needed inspiration.


I've had a little help from two things....one is that fabulous machine under my latest "inspired" creation.  That machine is called the Cricut Expression, and it does some amazing things for me.  It's made my scrapbooking life so much easier since December by allowing me to digitally decide the font or design needed along with the size.  In this case, the font of the word is from a cartridge called Storybook.

The second source of inspiration has been my volunteer work with a California-based agency named Charity Wings.  

Last weekend (pre-Chicago blizzard), I was able to take part in a great weekend webcast from CHA that gave me the chance to interact with some of my favorite designers and manufacturers.  It was a very cool moment.

Anyway, since I've been snowed in, I've had the chance to play around with some of the stuff I received at the webcast, and I was also able to try a few things that I have never done before.

Case in point....see that white block piece that all the scrapbooky stuff is on?  That is actually the leg to an old coffee table I had.  It was one of those cheap dorm room tables that fit perfectly in my teeny tiny apartment.  The table broke a few months ago, and I held on to this one leg with the hope of converting into some sort of art.  Ummm....that was a few months ago, and I was planning on chucking it.

But I finally did it!  I pulled out the cricut and got to work.  

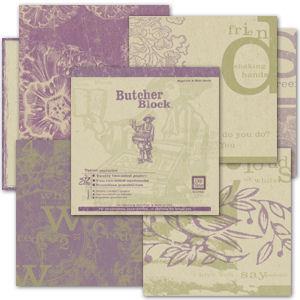
First thing I did was cut out the cute lettering from a Paper Company Studio, 12x12 inch sheet called Spring Break Postcards.  It's a beautiful print and I liked the colors.  I then distressed the edges with my favorite Tim Holtz ink, Pumice Stone.  That's how I got the weathered look.


During the webcast, we also met a great designed named Traci Bautista who does a lot of doodling in her work, so I decided to experiment a little bit.  I didn't go crazy or anything, but I told myself I had to try a little something different, so I did.  Polka dots on my letters is not so much doodling, but I added a little something the wings. Note to self - sign up for a Traci Bautista class so that I can go full force next time without fear!


Now let me explain the wings.  The wings came in my supply packet from the webcast, as they represented the sponsoring organization, Charity Wings.  I volunteered to write for their blog in October 2010, and I cannot believe what an inspirational part of my creative life they have become.  So, of course, I had to add the wings to the piece as my constant reminder.  

I distressed and doodled on the wings to maintain the same feel throughout.  I added a few stamped images from a Hero Arts stamp called Little Dot Circle, and I used a leftover piece of pearls from a Prima Marketing line called e.  It's item #300050.

On the ohter wing, I added a remnant of a piece of ribbon that came in my packet last week, but to age it up a bit, I slabbed some acrylic paint on it.


So I'm pretty happy with my first attempt at altered art.  It wasn't nearly as scary as I thought it would be.  Next time, I'll be even more fearless and just layer and layer!


Oops!  That picture was taken before I added the bow...but I think you get the picture.

Digging out

Well after three days of not leaving the house, I decided it was time to venture outside and check on the car.  As I opened the back door, all I could do was smile.  I was greeted by this cute sight.

a FAT snowman!

After I giggled a bit at the hilarity of his enormous body, I walked to the front of the house to check on my car.  This was the state of affairs.

Hmmm....couldn't really get in through the front driver's side door.  Thankfully the snow was blowing perpendicular to the car, so I was able to get in through the passenger door to turn it on.  I'm so thankful for a new car....batteries were new and doors weren't sealed shut.

Then I pulled out the shovel and proceeded to dig away.  Oh boy!  Some of the snow was light and fluffy yet a mess of it was super heavy from where the salt had melted it but that cold temps had frozen to shear ice chunks.  Note to self....one of the many benefits of a husband/boyfriend include moments just like these.

Gratefully, my upstairs neighbor saw me and came out to help!  I also have a sneaking suspicion that he threw out the garbage bag I had at back door to throw out when I came out.  I heart him and his family - they are the best!  We dug a driveable path and cleared the doorway.

1.5 hours later, I've decided that there is no way in hell I'm moving the car this weekend.  I would rather take a cab to brunch tomorrow than move the car and have to shovel AGAIN!  The expense is so worth it!

I'm also trying to figure out what furniture I can put outside to save my space.  I totally hate those people....because I think the street is public property.  However, these lazy dummies who won't clear their spaces/sidewalk make me angry, and thus I don't they deserve my hard work.  Hmmm.....but I don't really have anything I can put outside.  I gotta think of something though for Monday!

Thursday, February 3, 2011

A Ktichen Makeover

I'll spare you all from my silly blizzard nicknames...I think I've used all the ones I like by now. Ha!

We were once again "banned" from coming to work due to the parking situation so I had to work remotely.  Totally cool, of course.  I'm blessed to have the ability to access all my files and emails from home.  So it was a normally productive day

with a twist!

While I worked, I also had the chance to access all my art supplies and start on a project I've been meaning to start forever.  It's kinda fun to have both items at my full disposal - work and fun.

Awhile ago, I update the rug, hand towels and oven mitts in my kitchen.  They are more of a mod feel.
But my wall art was more French Art Nouveau (which I mistakenly called art deco). I'd like to publicly apologize to all my true artist friends - I will never mix the two up again as they are so clearly different.  This is one of the posters currently in my kitchen.


Obviously, there was a major mismatch of styles in my kitchen, and it was driving me crazy!  So I told myself that I needed to take advantage of my time at home and do something about it.

So I took out all my cricut cartridges and frantically looked through them for items that might work.  Thankfully, I had SEVERAL options to choose from, but in the end used flowers, leaves and birds from the following cartridges:
  • Storybook
  • Ashlyn's Alphabet
  • Winter Wonderland
  • Serenade
  • Graphically Speaking

I layered all the cutouts over freehanded branches and then distressed the whole thing with Tim Holtz inks (Pumice Stone and Vintage Photo colors).

Lastly, I crudely painted the frame with old acrylic paint.  It was a bit clumpy, but it didn't matter too much as I knew that I would be sanding some off to give it a distressed look.  I tried to paint as evenly as possible.

Final result?

Wednesday, February 2, 2011

The Snow-caine Overdose

Well, I'm not quite sick of being home yet, but I'm guessing I'll start to feel the itch tomorrow to just get out.

However, we've pretty much been ordered to stay away from work if we're non-essential patient staff.  What this means is.....if you don't take care of patients, then don't come into the office!  Don't get me wrong, I'm glad that I don't have to try and trek it to work like so many other folks, however the reason is that parking is still a nightmare around the Medical Center.  It's SNOW JOKE....a lot of streets still look like this!


If the situation is still ugly around a hospital, what's it look like outside my door?  Answer = I don't know!

Because I live in a basement apartment, I have no perspective of the street....so I can't tell if it's been plowed yet.  How funny is that?  I literally have to get my butt outside tomorrow to see...but they said it's going to be a high of 8 degrees tomorrow.  Ummm....I don't think I'm leaving the house because otherwise I'd might look like this!


This could be quite problematic for me when Friday rolls around, and I get cabin fever.  I'm sure there is going to be a nasty layer of ice on  my poor car :(

In the meantime, I've been able to occupy myself with a little fun tonight.  I watched two of my Netflix DVDs that I've had since NOVEMBER!  I watched Notes on a Scandal and The Curious Case of Benjamin Button.  Considering these were both nominated at the same time (maybe two years ago), you can see how far behind I am on my queue.  Both movies were excellent though and both starred Cate Blanchett (interestingly enough)!

While watching the movies, I've also scrapped a bit.  I recently learned about a cool organization called Card Cupids that sends cards to kids who need them (kids who need a little cheering up cuz they are sick).  They are based out of VA, and it looks like anyone can refer a munchkin to them, so I've already sent it off to our folks at the Medical Center.  They are a super new org (November 2010) with a heartfelt idea, so I'm all in!

Basically, people like me can make cards that they'll get to a little person who needs it!  It's really a cool idea, and a great way for me to use some of my inventory while feeling like I'm giving back.  Plus it's fun to make happy cards.  Here are a few pics - sorry for the awful photos...I'll try to take better pics later!  I can't figure out how to rotate them either, so I apologize!


snOMG 2011....Snowtorious BIG Chicago

A little bit of perspective

this was the view last night at 9:30pm.  We hadn't had much snow....so this was already a lot.

my view this morning at 7:45am.  Ummmm....apparently that's about 18 inches of snow (what you see are the results of some snow drifts).  And no, that's not my car....but my car is on the opposite side of the street!  Here's hoping these cars helped keep off a chunk of that snow!

The best/worse part?

It just starting snowing AGAIN!

Thankfully my apartment did not lose power like the 50K+ people in the Chicagoland area.  I don't even know what Charlie and I would have done then.
Oh wait....we'd do this. (He's been curled up in different locations throughout the house since yesterday).


Good luck Northeast coast friends - I hear you'll get more ice than snow :(  That's gotta not be good in a whole different kind of way.