I jumped at taking the course when I saw that she would be teaching us how to make paper cone wreaths.You see, she has a large wreath in her craft room that I have coveted since the first time it appeared in her videos.
Using old books (or in my case, books I was planning to chuck in my decluttering), I went to task on creating some fun "nerdy" crafts for my home.
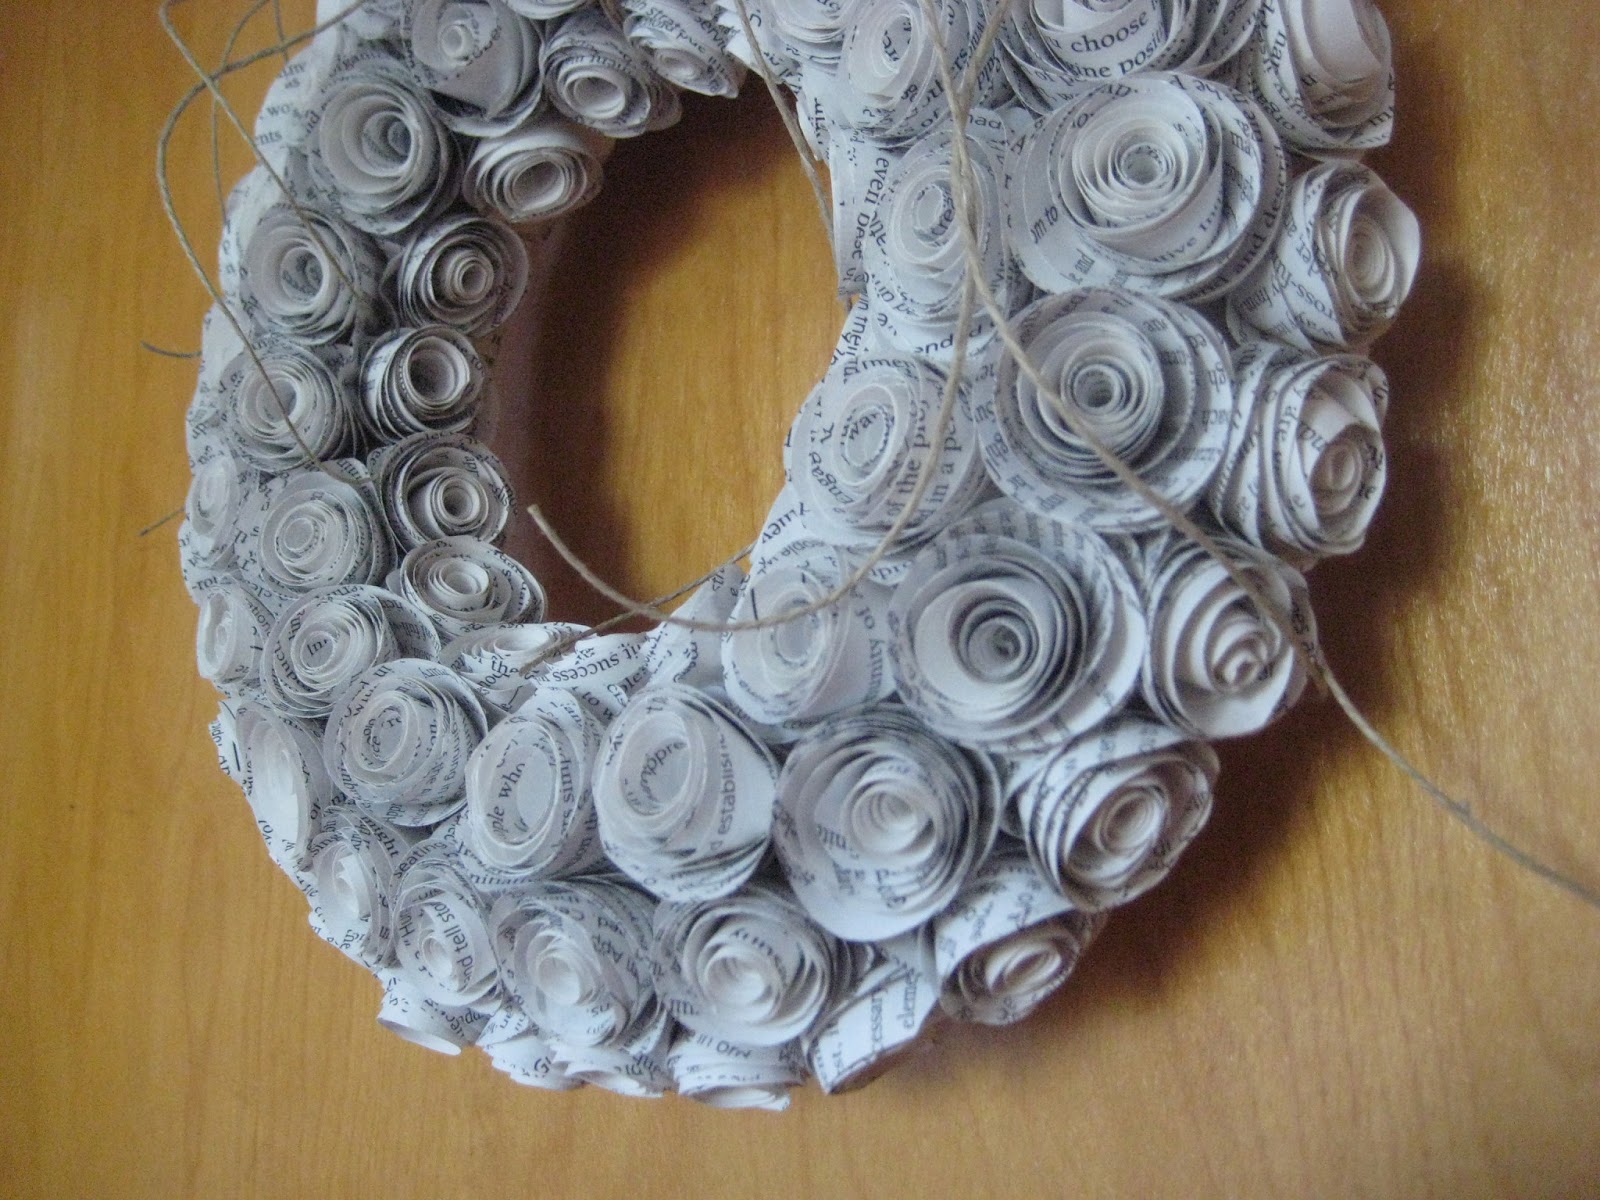
The most tedious of the projects was a wreath covered in paper roses. I'm glad I chose a small base, but I love how delicate the flowers look and smile every time I get to my door (where it is currently hanging).
I literally tore apart an ENTIRE book to make this small wreath.
I thought about giving this away as a gift (as I do with all my projects), but I ended up keeping it!
The second project was the piece I was dying to make! I thought I would end up putting the final project in my craft room, but I realized that it would fit perfectly in my dining room. I needed art on my walls, and pieces made with book pages seemed to fit the room well because that's where my bookshelf is located.
The base was a simple ring covered in book pages. I then proceeded to attach cone after cone after cone.
I added a little lace, some paper flowers and some buttons.
I just love the volume and subtle color this wreath gives my walls.
One of two cone wreaths that currently hang on my wall. I'm hoping to add a smaller third one. I believe in the power of three for visual balance.
Love, love, love these projects. I'm so glad that there are so many mediums to learn new techniques. Being able to take a class online means that I can take my time to gather my materials and watch when I'm free. I'm definitely planning to take some more!
A long delay does not equal a lazy crafter! I've probably done more crafting in the last two months than I have in a really long time, and it's been a ton of fun.
I've decided to dabble in the mixed media realm for the first time. While I'll always be a paper crafter at heart, I needed to push my crafting comfort zone a bit. If you know me well, you know I love a crafty challenge!
So what would be my first challenge....
For a work fundraising event, I was charged with adding a masquerade mask to my formal attire. I waited until the last minute to really start hunting for a unique mask and I realized I would have to drop a pretty penny to buy one. I much more preferred to give a donation to our cause then to buy a mask I probably wouldn't wear again.
I went to youtube and I did a search for DIY masquerade masks and came across this video:
I couldn't believe that all the ingredients I would need would be aluminum foil, tape, and newspaper. Lord knows I had the embellishment supplies to spare, so I figured I had nothing to lose in trying.
Off I went on my crafty adventure!
Are these really the majority of the craft materials needed?
Molding layers of aluminum foil on your face is much harder than I expected.
Ha! I needed to make sure my molding was on target. Had to make the eye holes a bit larger than originally drawn.
It wasn't until the papier mache part that I really felt like we had something coming together.
Painting my base
And then I lost my mind looking for embellishments!
I had a bunch of embellishment options, but I realized I also wanted to use up supplies that I hadn't touched in months. So I took some of this adorable "Day of the Dead" fabric I bought YEARS ago and went with it. After all, I am Mexican...so why not celebrate it!
I also went with a mask on the stick...probably the smartest of my decisions.
I had a blast watching this unfold step by step and I liked the original look of my final project.
This first little dabble in the mixed media world was not as scary as I imagined. Here's to more fun projects!