I'm choosing to brag about the one thing I know I do best. KIDS!!!
From babies to teenagers, the skill I'm most proud about is my ability to connect with them. I'm a baby whisperer, the one to tame a crowd of young kids, and the one to make a quiet teenager engage in a conversation.
I woke up early today because I wanted to start this layout. I had picked out my picture and my pretty papers and had a concept in mind.
This past year, I've played around with make-up and fake eyelashes (which I love). When I couple great make-up, its application and a general happy disposition, I find myself feeling really confident physically. Now, I'm not a size two model (and probably never will be), but I know the power of kind eyes and a great smile.
So what happens when you feel good...well as a scrapbooker, I want to document it visually. So I started this hysterical trend of trying to take a good selfie. Who knew selfies could be so stinking card? I have so many terrible angles of my face but am completely taken aback by some of the photos.
This photo is one of my personal favorites because I feel what I'm projecting visually. Looking at this photo, I feel happy and that's because I have been happier this year. A lot of that has to do with being happy professionally. I already love my personal life but my professional world was missing a key piece - a targeted passion point.
I took this picture on March 31, 2013 which was almost exactly a year after I submitted my resignation to take my new position with Ronald McDonald House Charities. This picture says it all.
I'm toying with the idea of applying to be a member of a design team to a really great company. I've been following their blog for months and have seriously considered becoming a member of its kit club.
The only thing that has stopped me from joining the kit club is the fact that I've been trying to declutter my craft room by using what I already own (which is a lot!). I don't really need more beautiful supplies!! Well....one could argue that I do in fact NEED those gorgeous embellishments and papers.
Scrapbooking From the Inside Out asks its followers to use their creative energy to express themselves about themselves. In all my years of scrapbooking, I have never made myself an album despite my best intentions. Even if I decide not to apply, I thought it would be fun to make layouts about me and my favorite life moments.
I've spent the last year delving deep in to a new world of work. I have loved every second, cried at how tired I've been and missed hanging out with my friends and family.
However, I haven't regretted any second of this time because I truly think I'm where I'm supposed to be career-wise. I've been so exhausted yet happy that I haven't even delved into my crafty world goals! I haven't necessarily forgotten them. I've just realized that I needed to push back some of my personal crafty goal deadlines. And that's ok.
I've even missed blogging, but I have used Instagram to share my current lovely moments. Some have been crafty but many have been work and friend related. There have been beautiful babies born (Julian & Marco), and I've seen so many of my munchkins grow (Ellie, Roya, Marlena, Mateo, and Jaiden). I've eaten lots of incredible food and sprained multiple body parts so I've also gained a few unhealthy pounds from the decreased mobility.
Am I happy? Yes!!!!
Body is feeling healthy. I've started eating better. I got a sassy new haircut. I've even been promoted twice in one year. Even I couldn't have imagined all that for one year!
So now it's time I recharge and recommit to all of it. I'm happy professionally, but now I need to better all the rest of it. My health, my soul and my love for exploring sharing my culture and self through art. Get ready for more regular posts!
My
colleague is the coolest aunt ever. To add to her coolness, she has
decided to add some special touches to her niece's first birthday
party.
I
had the pleasure of meeting little Xitlali last July when she was just a
few weeks old. I remember getting to snuggle her at work so I was
shocked to learn she was turning one. Where does the time go?!
Xitlali
is having a Dora the Explorer fest and her aunt wanted to make sure
that the decor was personalized. When you're blessed with a
beautiful/unique name (I might know something about that), you have to
custom make anything personalized. So.....enter me!
This cute little sign will be used for photo opportunities.
These
little flowers will be used in the centerpieces. I got the ideas from a
Pinterest board my colleague created. I can take no credit for the
idea, but I can say that I had to whip open my Adobe Illustrator to play.
It's been awhile since I've done that.
The
most detailed piece commissioned was the birthday banner. I couldn't
find polka dotted pink paper so I used my Cricut machine to create my
own. It was a little tedious but I love the layers of paper in each banner
segment.
To
top off the fun I had making these projects, I actually created
everything in my newly super organized craft space. It's been amazing to
walk in here and not only have a place to work but to also know what my
inventory is and where to find it. If you've ever lived with me and my
crafting (Sogol? Dortiz?), you would be amazed! Seriously....amazed.
See? I have empty and decluttered shelves. Madness!
I jumped at taking the course when I saw that she would be teaching us how to make paper cone wreaths.You see, she has a large wreath in her craft room that I have coveted since the first time it appeared in her videos.
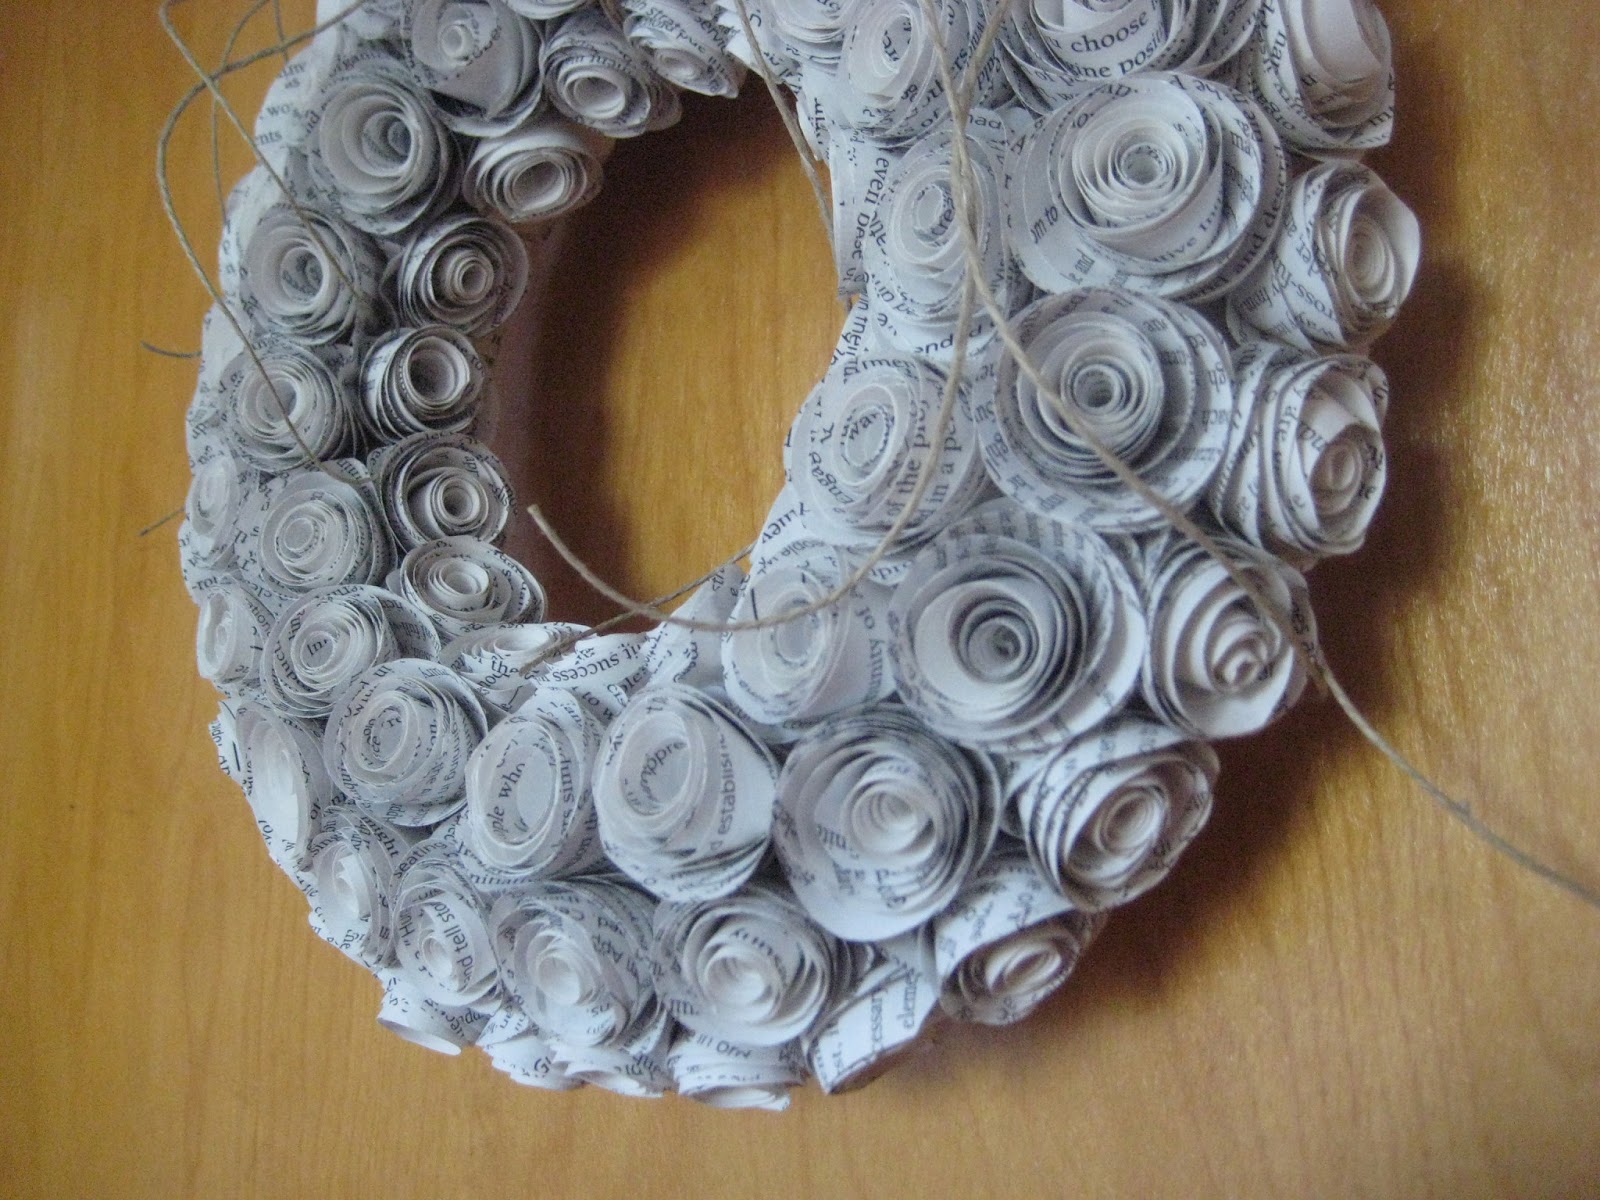
Using old books (or in my case, books I was planning to chuck in my decluttering), I went to task on creating some fun "nerdy" crafts for my home.
The most tedious of the projects was a wreath covered in paper roses. I'm glad I chose a small base, but I love how delicate the flowers look and smile every time I get to my door (where it is currently hanging).
I literally tore apart an ENTIRE book to make this small wreath.
I thought about giving this away as a gift (as I do with all my projects), but I ended up keeping it!
The second project was the piece I was dying to make! I thought I would end up putting the final project in my craft room, but I realized that it would fit perfectly in my dining room. I needed art on my walls, and pieces made with book pages seemed to fit the room well because that's where my bookshelf is located.
The base was a simple ring covered in book pages. I then proceeded to attach cone after cone after cone.
I added a little lace, some paper flowers and some buttons.
I just love the volume and subtle color this wreath gives my walls.
One of two cone wreaths that currently hang on my wall. I'm hoping to add a smaller third one. I believe in the power of three for visual balance.
Love, love, love these projects. I'm so glad that there are so many mediums to learn new techniques. Being able to take a class online means that I can take my time to gather my materials and watch when I'm free. I'm definitely planning to take some more!
A long delay does not equal a lazy crafter! I've probably done more crafting in the last two months than I have in a really long time, and it's been a ton of fun.
I've decided to dabble in the mixed media realm for the first time. While I'll always be a paper crafter at heart, I needed to push my crafting comfort zone a bit. If you know me well, you know I love a crafty challenge!
So what would be my first challenge....
For a work fundraising event, I was charged with adding a masquerade mask to my formal attire. I waited until the last minute to really start hunting for a unique mask and I realized I would have to drop a pretty penny to buy one. I much more preferred to give a donation to our cause then to buy a mask I probably wouldn't wear again.
I went to youtube and I did a search for DIY masquerade masks and came across this video:
I couldn't believe that all the ingredients I would need would be aluminum foil, tape, and newspaper. Lord knows I had the embellishment supplies to spare, so I figured I had nothing to lose in trying.
Off I went on my crafty adventure!
Are these really the majority of the craft materials needed?
Molding layers of aluminum foil on your face is much harder than I expected.
Ha! I needed to make sure my molding was on target. Had to make the eye holes a bit larger than originally drawn.
It wasn't until the papier mache part that I really felt like we had something coming together.
Painting my base
And then I lost my mind looking for embellishments!
I had a bunch of embellishment options, but I realized I also wanted to use up supplies that I hadn't touched in months. So I took some of this adorable "Day of the Dead" fabric I bought YEARS ago and went with it. After all, I am Mexican...so why not celebrate it!
I also went with a mask on the stick...probably the smartest of my decisions.
I had a blast watching this unfold step by step and I liked the original look of my final project.
This first little dabble in the mixed media world was not as scary as I imagined. Here's to more fun projects!